Building the Original MK1 by Joseph Tompkins and retrogamer.evo
The Original MK1 by the immensely talented Joseph Tompkins is the reimagining of the Gameboy Advance SP from the clamshell format into a hingeless Gameboy Pocket style form factor. I immediately gravitate towards these form factors and the GBA is my favorite out of the entire Gameboy series. I had seen this 3D print early on and wondered about it but had concerns about building a fully 3D printed device since without any part of it supported by a mold-injected cast shell it would be brittle and leave little room for build errors and tinkering. However, reading NatalieTheNerd’s blog post about her failed attempts at creating a Game Boy Pocket Advance led solidified my interest in building the MK1.
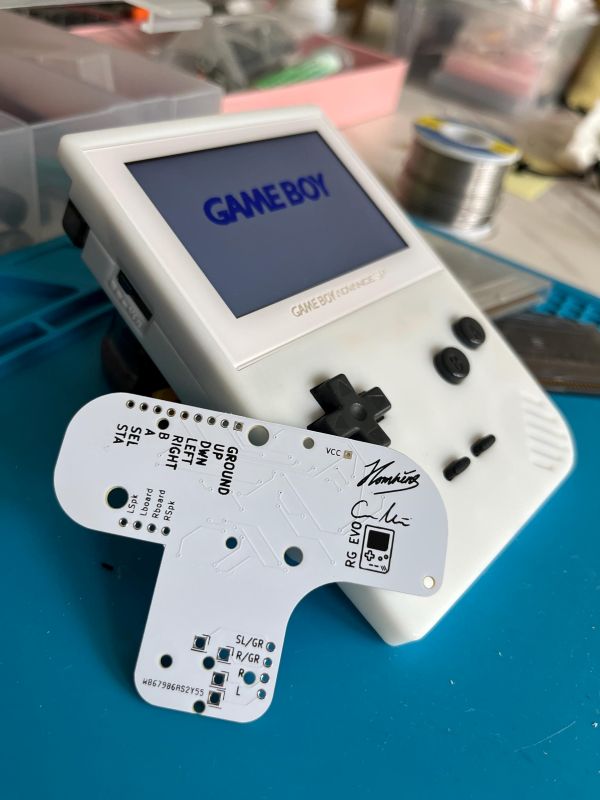
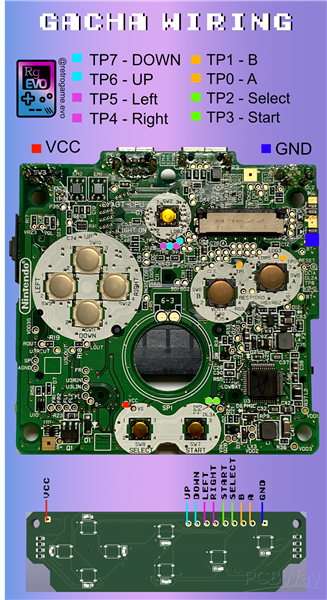
To start–there’s limited to no direct documentation on how to build the MK1 but I suppose if you are a seasoned modder you can do it rather intuitively. (I am not.) I spent a fair amount of time looking @northbestelectronic’s IG posts and used the GachaSP’s wiring schematics. What the most outwardly available is Joseph Tompkin’s ko-fi MK0 Files and Jonas retrogame.evo’s PCBWAY Gameboy MK0 PCB button and sound interface printed circuit board. I also messaged Joseph on his ko-fi for some pointers.
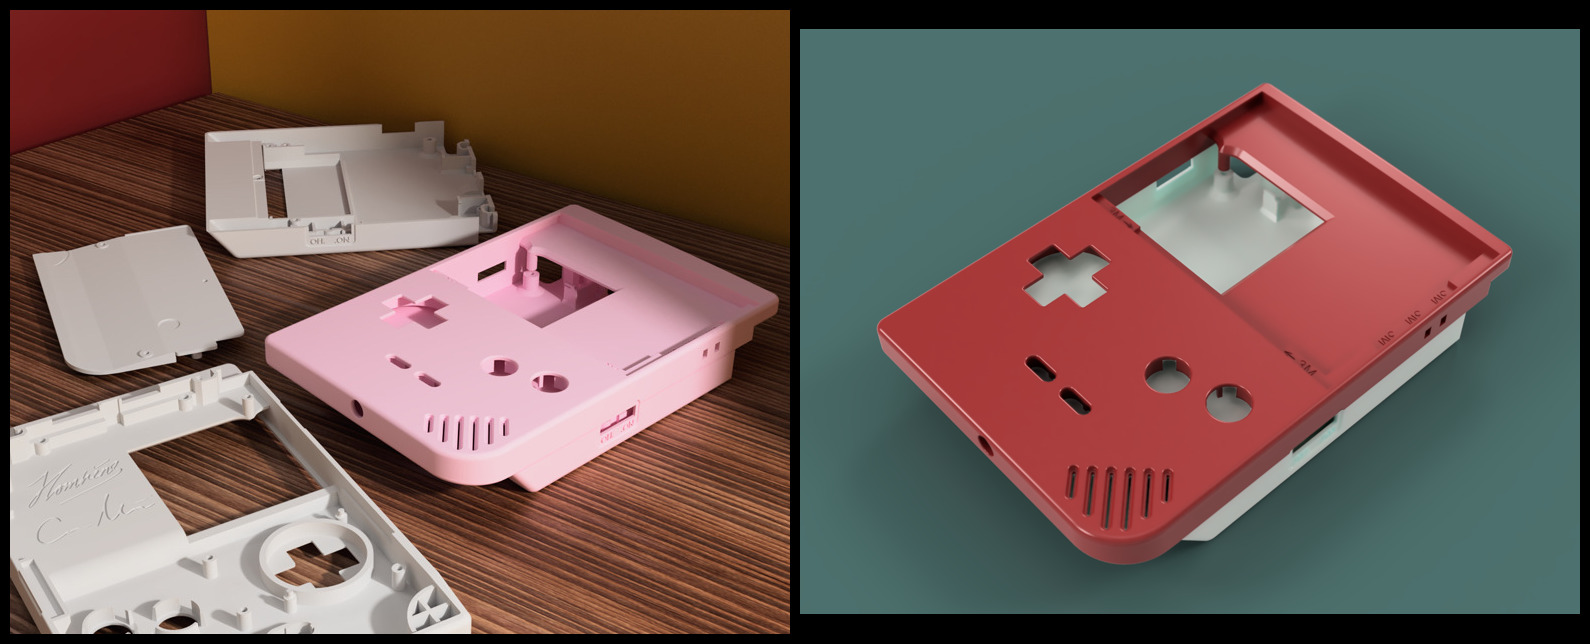
Picture from Joseph Tompkin’s ko-fi, Original MK1 (now renamed “MK0”)
The most important part of this build is sourcing the proper screen. MK1’s front shell has several important factors that determine a very specific screen type. I messaged Joseph and he told me this build was specifically made for a GBASP screen that is no longer made, FunnyPlaying IPS V2. But as of April 2025 this build was still possible using an IPS V3 screen that I found on AliExpress. I also found a few of these floating around on eBay but they are quite rare and the touch sensor variant is ideal for OSD to toggle screen settings.
For the screen to fit into this shell, the screen itself needs to have no protruding edges around the bezels and the ribbon cable and PCB needs to be on the right side (when looking from behind) which is what the original FunnyPlaying IPS V2 was. Many of the updated IPS screens will NOT work. I’ve noticed that most of the newer screens have the ribbons at the bottom of the screen. In my message with Joseph he cautioned that the MK1 would be a complex build with the no longer manufactured parts and that it would need to be updated in the future. And no, I did some measurements, despite the ribbon and PCB on the right side of the screen, the DSI screen will not work either since the PCB height exceeds the shell’s window. I absolutely loved and enjoyed this build very much and hope to have a chance to build another one of these if I can get another screen that works with this shell.
The design of this device is amazing and everything fits together very well. Perhaps at some point I will re-print and re-build this into a stronger material for better build quality, but for now it feels and plays perfectly well.
GBA SP screens
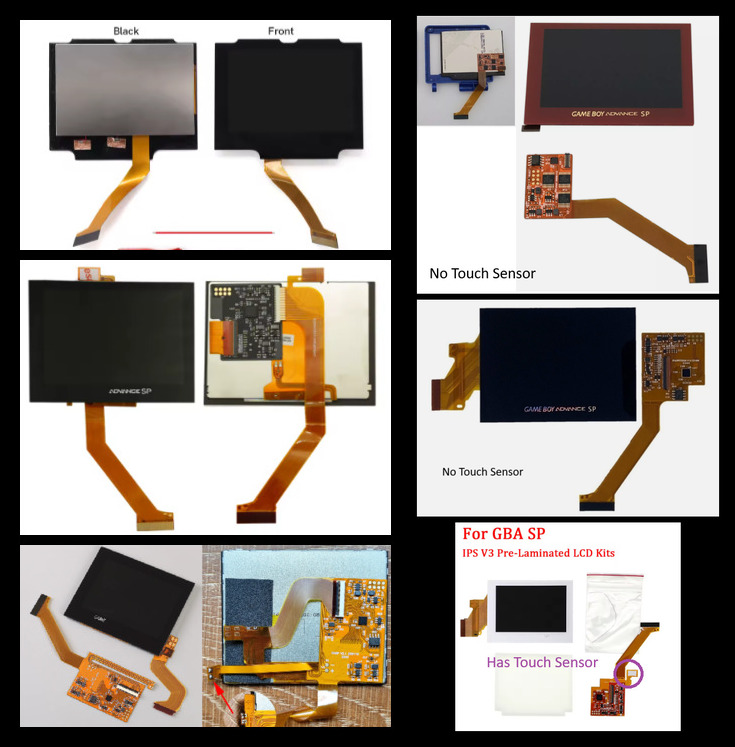
| Will NOT work | Will work |
|---|---|
| Protruding bezels | Original FunnyPlaying V2 |
| Ribbon cable in the wrong place | High Brightness Laminated IPS “V3?” without touch sensor |
| PCB too big for the window | High Brightness Laminated IPS V3 with touch sensor (for OSD) |
| “IPS V3” does not mean it will work |
Build materials
- 3D Print MK1
- MK0 Custom Button Board
- GBA SP motherboard
- IPS screen that fits (see above)
- 23mm GBC speaker “Louder speaker”
- LiPo battery 603048 3.7V
- Double-sided tape — cell phone repair tapes work well
- GBC buttons, triggers, hinges, springs
Other materials
Heads up: this post contains affiliate links. If you click through and buy something I may earn a small commission at no extra cost to you. See the About page for the full disclosure.